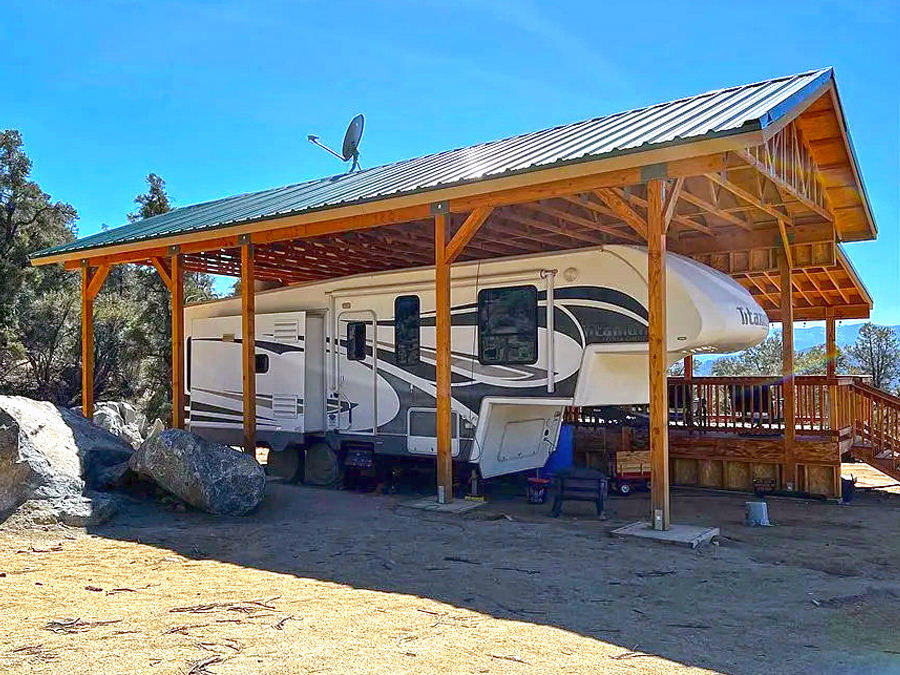
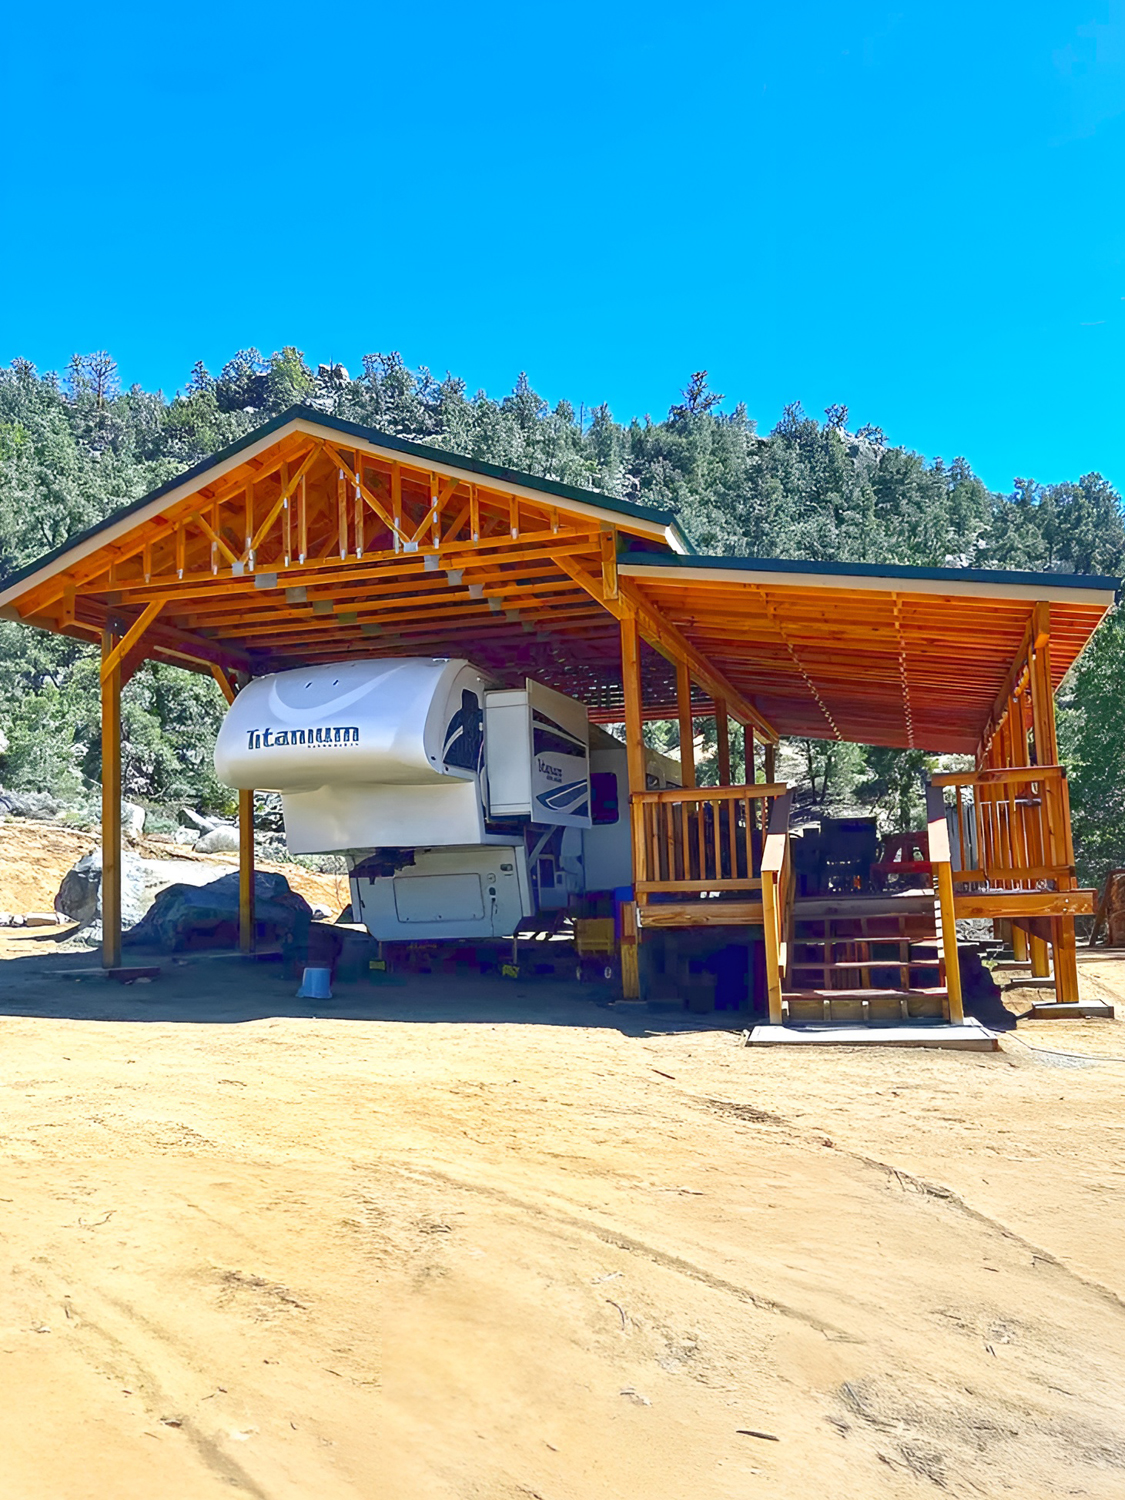
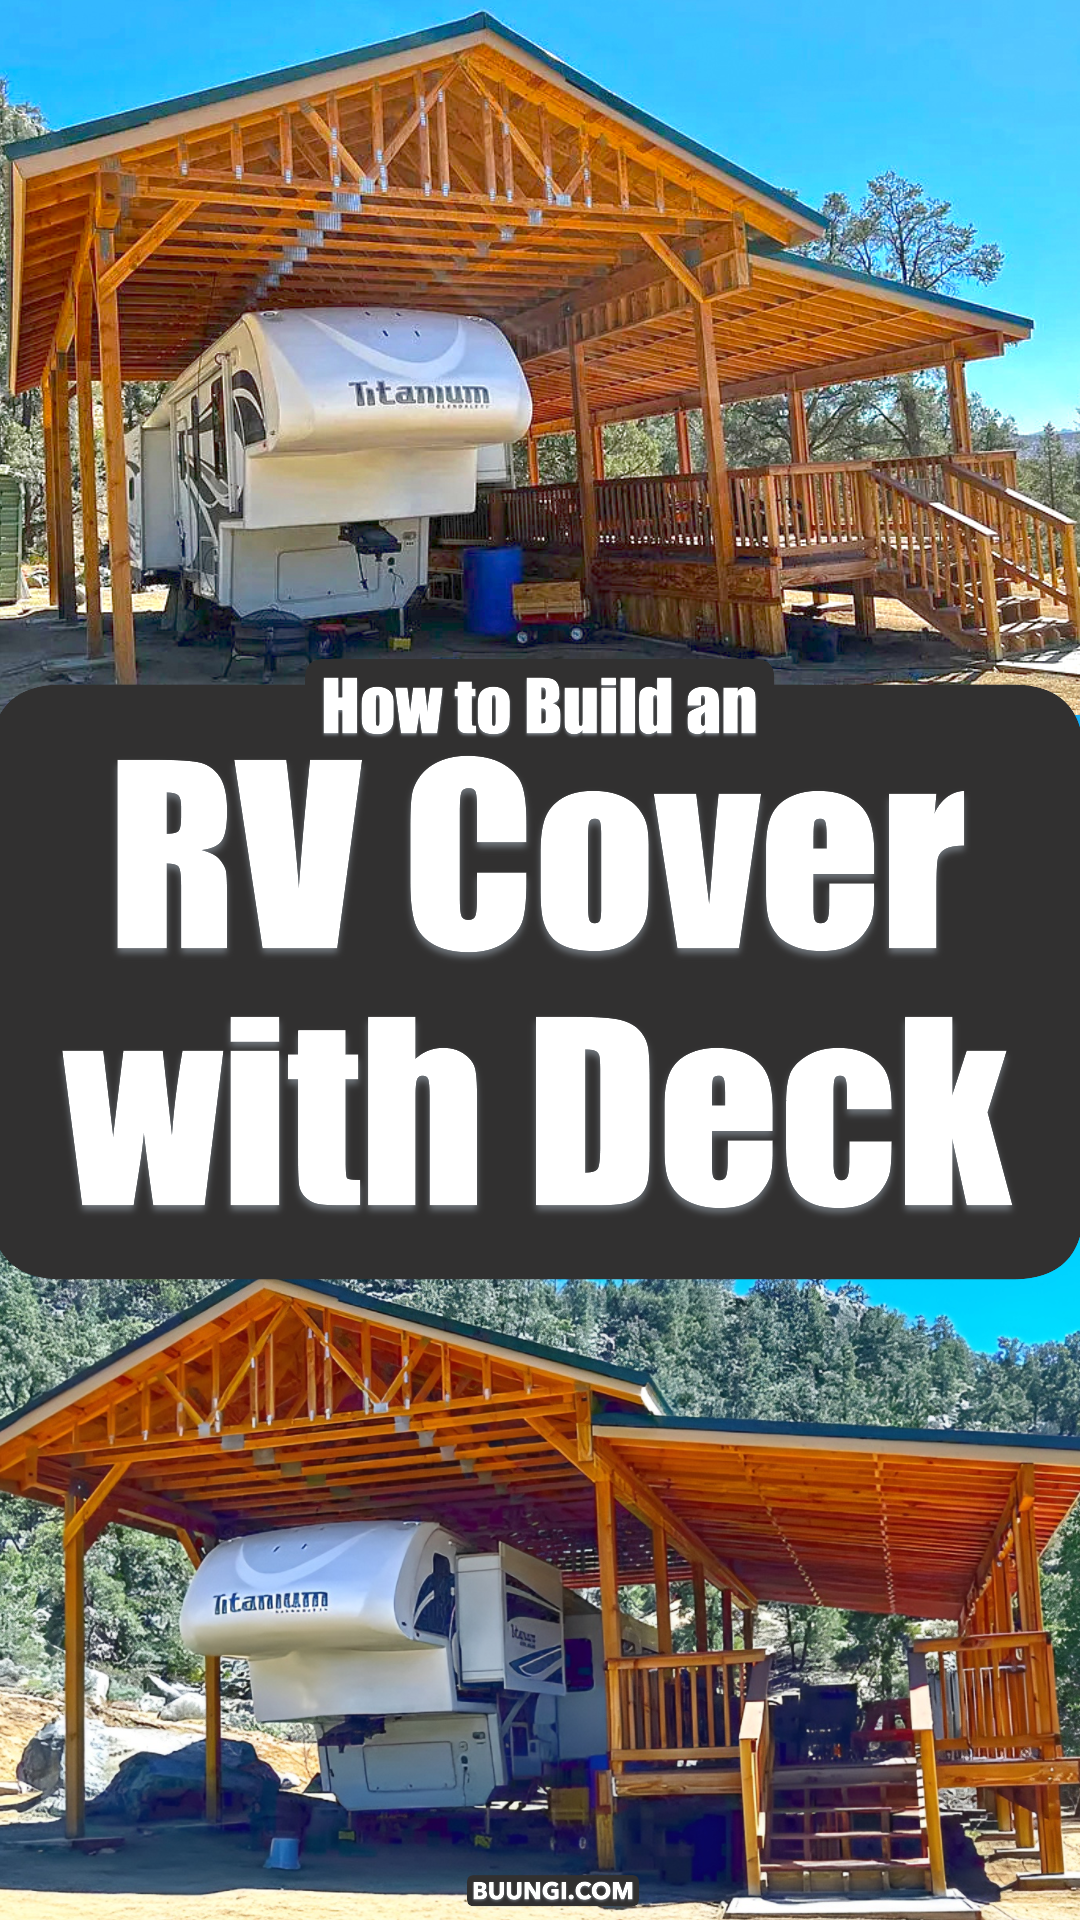
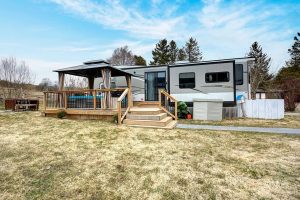
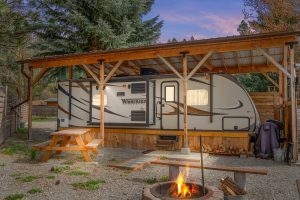
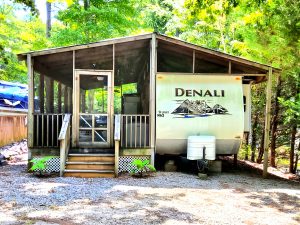
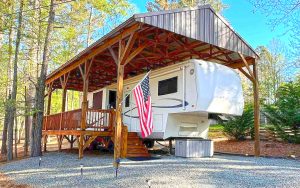
Ever dreamed of turning your RV into more than just a getaway vehicle? Imagine parking it under a sturdy roof with a spacious deck stretched out beside it. Now picture sitting there in the shade with a cup of coffee, string lights twinkling overhead, and the mountains in view. Sounds dreamy, right? That’s exactly what building an RV cover with a deck can do—it transforms your RV setup into a true home base.
Whether you live in your RV full-time or use it for weekend escapes, this kind of setup gives you shade, weather protection, and outdoor living space. The best part? You can build one yourself with a bit of planning, some basic tools, and a free weekend or two. Let’s walk through how to design and build your own RV cover with deck step by step.
1. Plan Your Layout First
Every great build starts with a plan. Before you grab the lumber, take time to measure your RV and sketch out your design.
- Measure your RV: Note the length, width, and height, including the air conditioner and slide-outs. You’ll need extra clearance so nothing scrapes. Add 3–4 feet on each side and at least 2–3 feet above your tallest point.
- Decide where the deck will go: Do you want it on one side, or should it wrap around? A single-side deck works best if you park close to property lines or trees.
- Think about access: Plan stairs leading to the deck, and decide where the entry door lines up with your RV’s door.
- Check codes and permits: Many counties require permits for structures of this size. Getting approval now saves headaches later.
This planning step sets the tone for the whole project. With a clear design in hand, you’ll know exactly what materials and tools to buy.
2. Prepare the Ground
Before you build upward, start with a solid base.
- Clear and level the site: Remove brush, rocks, and debris. Use a rake and tamper to smooth things out.
- Add gravel or crushed stone: A 3–4 inch layer helps with drainage and prevents mud under the RV.
- Mark your layout: Use stakes and string to outline the footprint of both the cover and the deck. Double-check your spacing against your RV’s measurements.
A level site means your posts will sit square and your deck boards won’t wobble later. It also keeps water from pooling under your RV.
3. Set Strong Foundations
The foundation carries all the weight of your cover and deck. Don’t skimp here.
- Concrete footings: Dig holes about 12–18 inches wide and at least 24 inches deep. In cold areas, go below the frost line.
- Post bases: Insert metal bases into the concrete before it sets. These hold your posts off the ground, preventing rot.
- Support spacing: Place posts every 8–10 feet along the perimeter. For decks, you’ll also need posts under the joists.
This is where your structure gains long-term strength. With solid foundations, your RV cover can last decades.
4. Build the Vertical Frame
Time to go up!
- Choose your posts: Use pressure-treated 6×6 lumber for the cover’s main supports. For the deck, 4×4 or 6×6 posts work.
- Plumb and secure: Set each post in the base, use a level to plumb it, then brace it temporarily.
- Beam installation: Attach double 2×12 beams across the tops of the posts using metal brackets or bolts.
This upright skeleton is the backbone of your RV cover. Once in place, you’ll start to see the shape of your project.
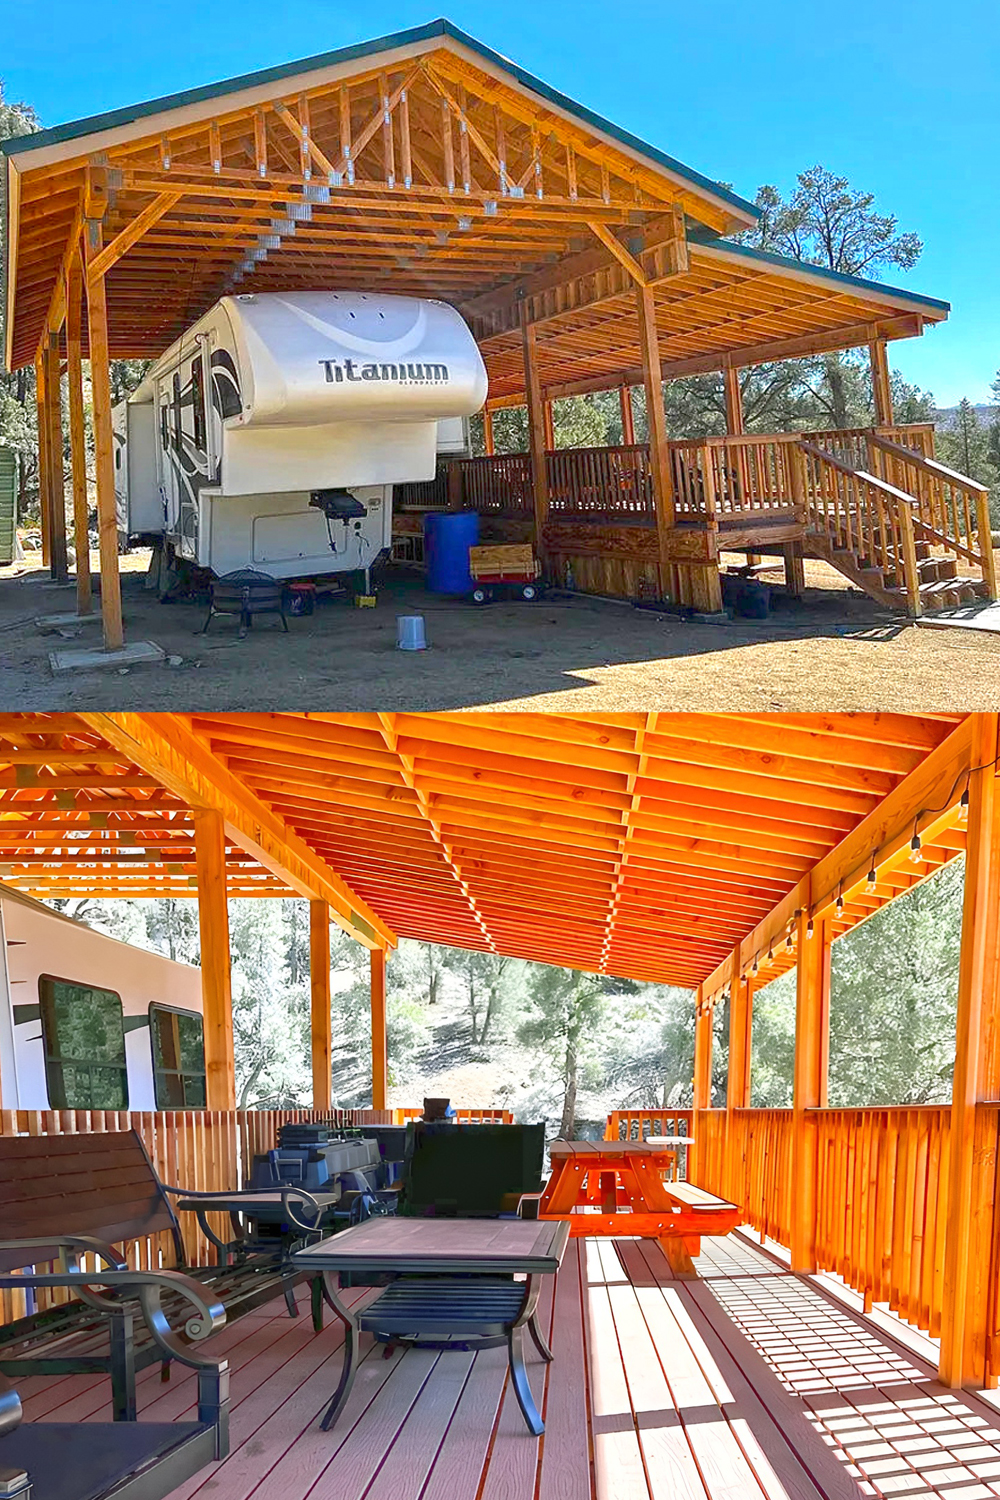
5. Frame the Roof
The roof is what truly makes this more than just a parking spot.
- Pick your pitch: A minimum 3:12 slope is needed for rain and snow runoff. Steeper pitches shed water faster and look more “cabin-like.”
- Rafters: Use 2×6 or 2×8 lumber, spaced 16–24 inches apart. Secure each rafter with hurricane ties.
- Plywood sheathing: Lay sheets of OSB or plywood across rafters. This stiffens the roof and gives your metal panels a solid base.
- Metal panels: Install steel roofing for maximum durability. It resists wind, sheds water, and can last 40+ years.
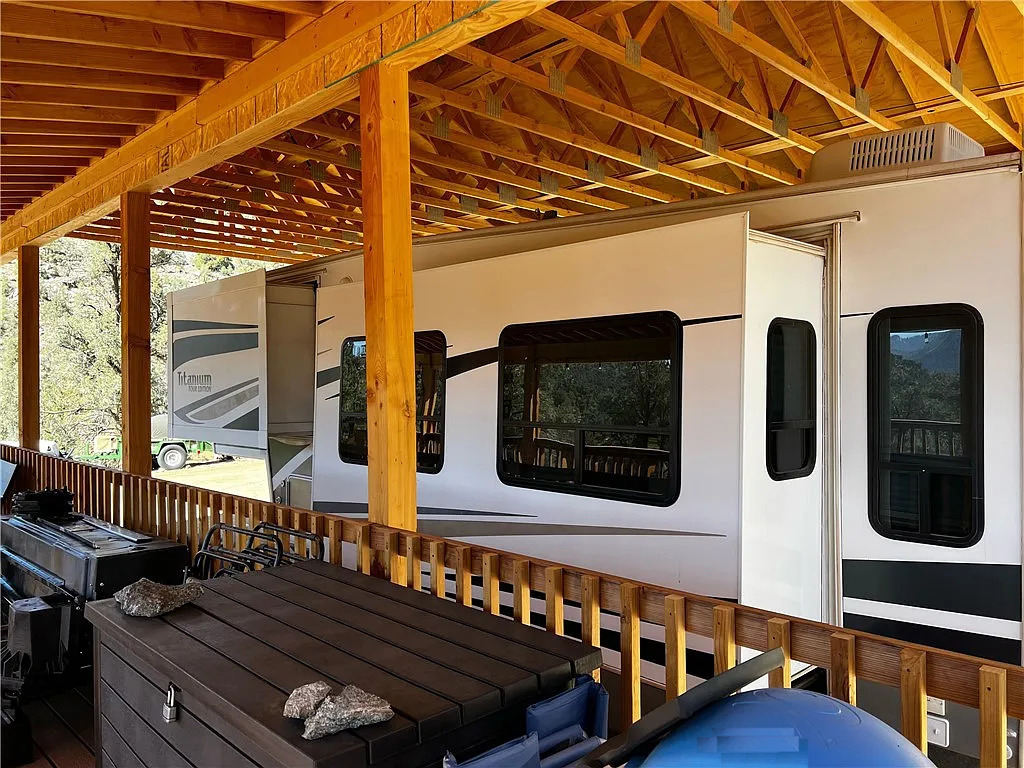
With the roof on, your RV is protected from blazing sun, heavy rain, or even snow.
6. Build the Deck Frame
Now it’s time to create the outdoor living space.
- Deck posts and beams: Use 4×4 or 6×6 posts set in footings. Run beams along the top to carry the joists.
- Joists: Use 2×8 or 2×10 lumber, spaced 16 inches apart. Secure them with joist hangers for strength.
- Blocking: Add short pieces of wood between joists for extra rigidity.
This step is like putting together the skeleton of a patio. Once you finish, you’ll have the base for your deck boards.
7. Install Deck Boards
Here’s where your project really starts to feel livable.
- Material choice: Composite decking is low-maintenance and long-lasting. Pressure-treated wood is more affordable but needs sealing.
- Board spacing: Leave 1/8 to 1/4 inch gaps between boards for drainage.
- Fasteners: Use deck screws or hidden fastener systems. Avoid nails—they loosen over time.
When the boards are down, the space instantly transforms from a construction site into an outdoor room.
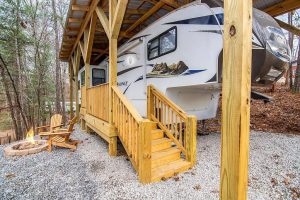
8. Add Railings and Stairs
Safety and style go hand in hand here.
- Rail posts: Anchor 4×4 posts every 6–8 feet along the deck perimeter.
- Rails and balusters: Install a top and bottom rail, then fill in with vertical balusters. Building codes usually require spacing less than 4 inches apart.
- Stairs: Use pre-cut stringers or build your own. Attach treads with deck screws and make sure steps are level.
The railing frames the deck, while stairs make it easy to hop on and off safely.
9. Finish and Protect the Wood
Outdoor structures live longer when they’re sealed.
- Stain or seal: Apply a weatherproof stain or sealer to exposed wood. Choose clear for a natural look or tinted for color.
- Metal protection: Use rust-resistant screws and brackets. A spritz of rust-proof spray helps too.
- Routine care: Reseal every 2–3 years and check for loose boards or fasteners.
This step preserves your hard work for years to come.
10. Style It Up
Now comes the fun part—decorating!
- Furniture: Add a dining table, lounge chairs, or even a hammock.
- Lighting: String lights, lanterns, or solar fixtures create evening magic.
- Plants: Potted flowers or small shrubs add life and color.
- Extras: Consider a grill station, outdoor rug, or even a fire pit nearby.
This is where your deck turns into an extension of your home.
Why Build an RV Cover With Deck?
Besides the obvious shade and beauty, there are real benefits:
- Protects your RV: UV rays, rain, and snow can damage your roof, seals, and paint. A cover extends your RV’s life.
- Expands your living space: A deck gives you a roomy outdoor area for cooking, eating, or relaxing.
- Increases property value: A well-built cover and deck add curb appeal and usefulness to your land.
- Comfort factor: Shade keeps your RV cooler in summer, while the deck gives you fresh air living year-round.
Estimated Costs
Here’s a ballpark idea of what you might spend:
- Posts, beams, joists: $1,500–$2,500
- Roofing: $1,200–$2,000
- Decking: $1,500–$3,000
- Fasteners and hardware: $500–$800
- Stain/sealer: $150–$300
Total: $4,800–$8,600 depending on size and material choices.
That’s a fraction of the cost of replacing a sun-damaged RV roof—or buying a pre-built carport and deck.
Final Thoughts
Building an RV cover with a deck isn’t just a project—it’s an upgrade to your lifestyle. You’re not just parking your RV anymore. You’re creating a shaded retreat, a protected basecamp, and a place to relax outdoors.
With the right planning, a solid foundation, and a bit of elbow grease, you can have a structure that looks like it belongs in a mountain cabin resort. So grab your tape measure, sketch out your design, and start building your dream outdoor setup.
Because the truth is, once you finish a project like this, you’ll wonder how you ever camped without it.
Related posts:
 Step Inside This Modern Travel Trailer: Inspiring Remodel Ideas
 15 RV Shelter Ideas to Elevate Outdoor Space and Protect Your Camper
 17 Stunning Camper Porch Ideas
 2006 Denali Camper With Screened Porch: Inspiring RV Remodel Ideas
 Step Inside This Stunning 1971 Airstream Overlander Remodel: Vintage Shine, Modern Comfort
 Step Inside This Charming 2004 Carriage Cameo Fifth Wheel Remodel
 Inside a Stunning 5th Wheel RV Camper Remodel That Feels Like Home
 Vintage Camper Trailer: 1964 Shasta Airflyte
 Charming Retro Caravan Makeover: A Sweet, Dreamy Retreat in Pink and Teal
 Stunning Caravan Makeover You’ll Love